
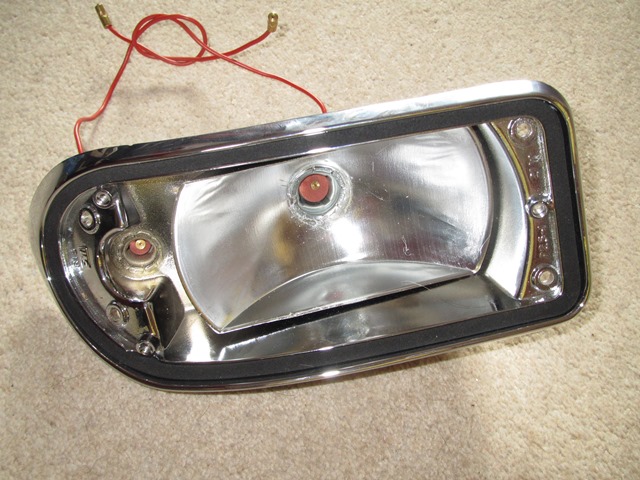
 Fortunately it was possible to re-chrome the sidelight/indicators. However to do so ACF Howell had to remove the bulb holders and reflectors, neither of which faired out too well during the removal process.
The other problem was that one of the lens screws had sheared and I’d forgotten to remove the remaining section prior to sending everything to be re-chromed. So not only was it corroded in place but it was now sealed with a layer each of copper, nickel and chrome.
It was carefully drilled to break the plated layers and soaked in penetrating oil for weeks before attempting to remove it using a left handed drill bit. It wouldn’t budge so there was no alternative except to drill it out and re-tap.
Fine in theory but the lens screws are an odd size (approx. 0.130″ diameter and 32tpi). None of the local machine shops had a suitable tap and various internet searched failed to find one too. The closest tap was 6-32 at 0.136″ diameter which will now require a different size screw.
 The next challenge was to find some new bulb holders which also proved to be very elusive. I finally managed to find some at the Stoneleigh spares day on a stall offering headlight re-silvering for very old classics.
The side lights require a bulb holder to fit a 5/8″ diameter hole while the indicator is for larger a 7/8″ hole. Once in place, the bulb holder edge is peened over to secure it in position.
The metal body of the light unit acts as the earth connection for the bulbs. A good earth would probably be achieved just by the four mounting screws, as the whole of the lower bonnet panel is earthed directly from the bonnet plug. However a brass bullet connector ring is also fitted to the indicator bulb holder and wired to the earth running in the loom.
| Components for front lights | Holder pressed in tightly | Earth bullet connector |
|---|---|---|
 |
 |
 |
The indicator bulb holder is much harder to fit than the side light as the holder edge needs to be peened over tightly so the earth connector at the rear and the reflector inside aren’t wobbly. I rigged up a method of clamping the rear which took care of the earth connector. The reflector could then be held hard against the unit while a metal rod was tapped to peen over the edge of the holder. An additional pair of hands would have been very useful!
The disadvantage of someone else dismantling the units is not being able to recall what was removed. As a result, I’d overlooked the re-fitting of the internal shield. Fortunately it’s simply secured by two 2.4mm rivets and once in place, creates separate indicator and side lamp compartments.
| Sprung bulb seats fitted | Almost forgot the internal shield | Shield riveted in place |
|---|---|---|
 |
 |
 |
I thought the rebuilding of the units would be fairly simple rather than the palaver it turned out to be to get replacement parts. It took three attempts to get the lens seating foam from SNG Barratt. Each time they were ordered I received the gasket for the side reflectors only found on US cars. Eventually we found out that my copy of their catalogue had a typo!
Fortunately the rubber boots fitted over the rear of the holders were in good condition as they’re not available any more. I also had to remake all the sprung bulb seat connectors as the wires were way too short.
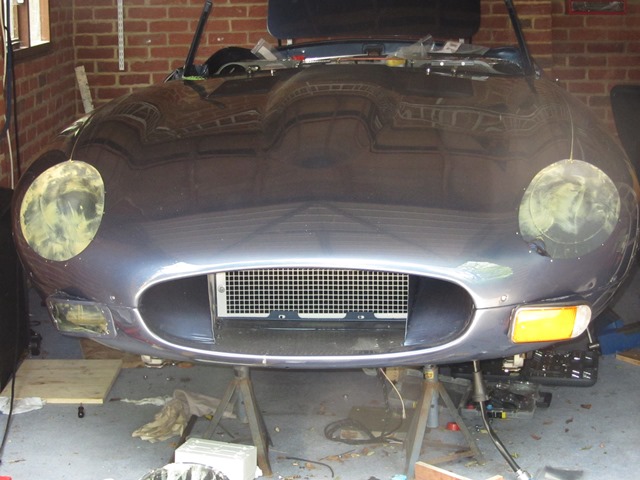
Still that would be the least of my worries …. all the chrome units had been sent to Hutsons specifically so they could be trial fitted and the body work adjusted prior to painting. Both indicators were miles out and clearly hadn’t be fitted before the bodyshell was painted and the lights sent on to be re-chromed. Really not impressed.
It appears that the holes for the indicator units in new bonnet panels are approximate and need to be fettled quite extensively. I therefore had no alternative – I’d have to take a grinder to my painted bonnet to open out and reshape the hole. The accuracy of the bonnet panel is also amiss as I’m certain the indicator inserts haven’t been welded into the bonnet squarely.
The other odd thing is that only two of the four mounting points have nuts welded to the bonnet panel. Once the headlights are installed there won’t be access to the rear of the units. So I’ve had to fit some spire nuts in these holes.
The mounting holes in the indicator units also had to be enlarged to try to overcome the alignment problem. Even so, I’ve not been able to mount the units a horizontal as I would like. It’s something that will bug me now!
| Complete unit ready for fitting | Much fettling was needed to fit | One down, one to go! |
|---|---|---|
 |
 |
 |