
 There wasn’t too much wrong with the steering rack, apart from some splits in the ball joint rubbers and bellows, which could be expected for the age of the car. Externally it looked a bit tatty but there didn’t appear to be any significant wear in the rack and pinion. There was only some very minor pitting in a couple of the rack’s teeth.
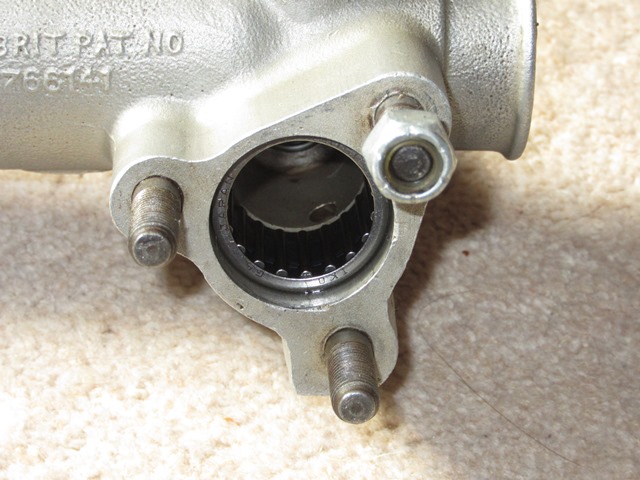
Therefore the aim was only to re-grease the internals and re-paint the housing. The pinion end of the housing is fixed to the picture frame via an attachment plate and beneath that is a pinion retaining plate. The profile of the pinion is such that there is a middle section that has a smaller diameter than the outer ends.
The retaining plate has a machined slot in the shape of two overlapping circles matching the two pinion diameters. The larger of which is off-centre. The plate slides over the end of the pinion through the larger hole before it can being centralised once it has reached the narrow section. Therefore the three studs must be removed to enable the retaining plate to be withdrawn.
| Pinion attachment plate | Pinion retaining plate | Removal of sprung plunger |
|---|---|---|
|
|
|
|


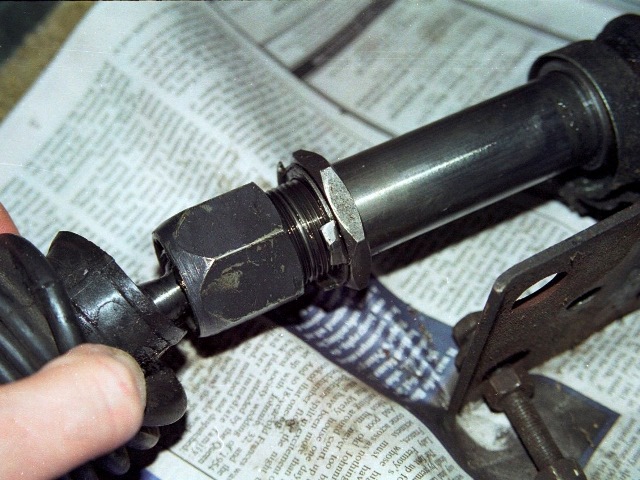
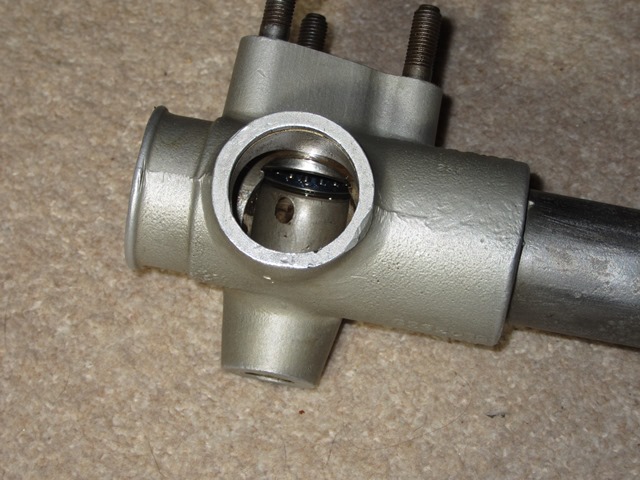
A sprung plunger is used to remove the free play in the rack and is held in place by a cover and circlip. Similar sprung plungers are used to provide sufficient resistance in the movement of the tie rod ball joints in their retaining housings.
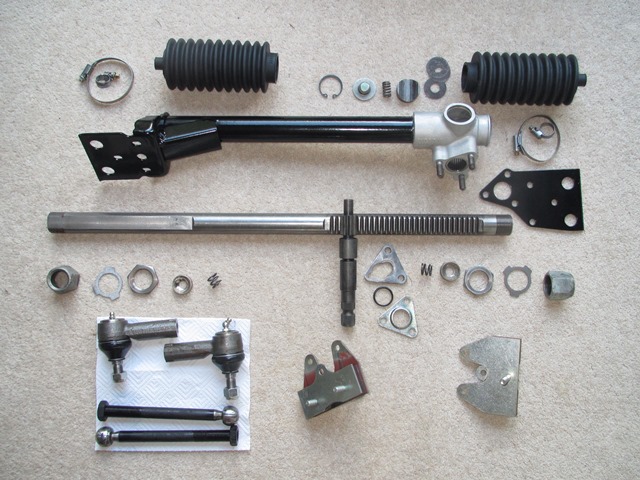
| Tie rod ball housing | Rack, pinion and housing |
|---|---|
|
|
|

Unfortunately there was a considerable break between the dismantling phase and finally getting round to rebuilding it. Sufficient time for the rack to be misplaced while in storage and numerous searches failed to locate it.
 With time running out, I had little option but to bite the bullet and purchase a new rack and pinion from Kiley-Clinton engineering. I knew I’d probably find the original rack shortly afterwards but the knock on affect of replacement would also be a full rebuild of the steering unit.
The profile of the pinion changed during the production of the Series 2 cars and with it the size of the larger of the pinion bearings. Naturally I had the later type and the replacement rack and pinions are only available in the earlier size. So I would need to replace the bearings to suit and, in a case of shipwright’s disease, it made sense to replace the brass bush pressed into the housing at the same time.
 The removal of the brass bush proved rather tricky without access to proper presses. As it’s fairly thin walled it’s difficult to get a drift on to it and I had to resort to a cold chisel to get it out.
I thought it best to get the local garage to press in the new bush and bearings to avoid any further mishaps. How wrong could I be!! They had pressed the outer pinion bearing in as far as it would go until it had reached a shoulder in the alloy housing. This resulted in the bearing protruding into the main shaft and stopping the rack being inserted.
| A bearing pressed too far!! | Resulting in a protruding bearing |
|---|---|
|
|
|
It would have to be re-done so I carefully ground down the bearing casing until it could be removed. With hindsight I should probably have sacrificed the smaller end bearing which would have given access for it to be drifted out.
The brass bushes are made slightly oversized and so it needs to be reamed in order to insert the rack, which should be a snug fit. I had to rely on the local machine shop as I didn’t want to purchase an adjustable reamer for a one off job.
 Just as all the components were ready to be rebuilt, I was searching for the gearbox breather when I stumbled upon the long lost original rack. Aaaargh!
Copious amounts of grease was applied during the rebuild. The only two points of interest were the need to shim the sprung plunger to give the correct end float of 0.15-0.25mm in the rack and obtaining the correct resistance in the tie rod ball joints.
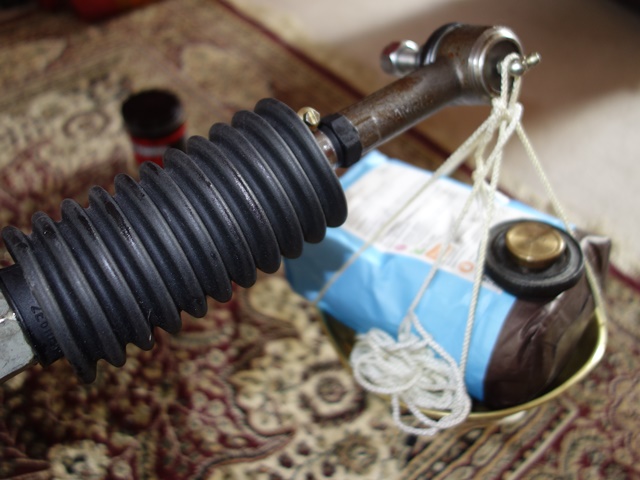
The service manual recommends using a spring balance to check that the tie rod only starts to move under a load of 7lbs. It was a rather fiddly process as a large change in clamping force is achieved by a very small rotation of the ball housing. A process not helped by my Heath-Robinson replacement for the spring balance – kitchen scales weights and a bag of flour!
Sorry, the comment form is closed at this time.