
 A pair of Lucas windtone 9H horns was fitted to the Series 2 E-Type, one emitting a high tone and the other the low tone. The excitation of the air column is achieved by vibrating an internal metal diaphragm, with the frequency of vibration and the shape of the horn snail or trumpet determining the note produced.
The switching frequencies are carefully chosen to produce a major third musical interval (spanning 4 semi-tones). Together they set up beat frequencies producing a tremolo affect and a perceptibly louder sound. In the case of the 9H, the low tone switches at 392Hz and the high tone around 494Hz, producing a G and B respectively.
Great in theory, however both my horns were stamped with an ‘H’ on inside of the trumpet indicating they both produce the high tone. Well, they would, if they both worked! One of them only produced a sound for a split second before falling silent. The only recommended external adjustment that can be made is the contact breaker gap via a small screw.
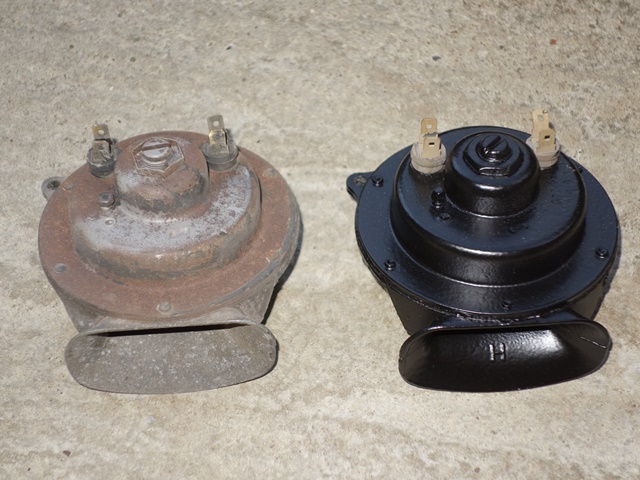 Rather optimistically I thought it would be just a matter of readjusting the gap to get it working again. Alas, there was something more seriously wrong inside so only the good one was repainted at this stage.
One of the problems with the horns is the two halves are press riveted together. I’ve not been able to find anyone who supplies these rivets so, even if a repair is possible, it won’t be an ‘invisible’ repair.
I’m thinking of using something like Chicago screws but first I need to get inside to find out how it works and if it’s possible to change the frequency. It’s a voyage of discovery from here as I’ve not found any information on the horn innards.
The rivets were drilled and then punched out – the rivet inside the trumpet is slightly shorter than the others so I’ll have to remember that when ordering fixings to hold it back together. The two halves can then be carefully separated as the diaphragm was sandwiched between two thin, wax impregnated gaskets which are quite fragile.
| Drilling out the rivets | Horn carefully split in two | Metal diaphragm removed |
|---|---|---|
|
|
|
|
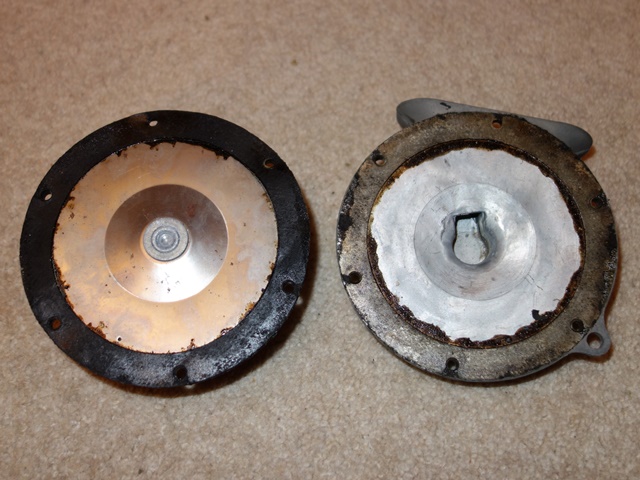
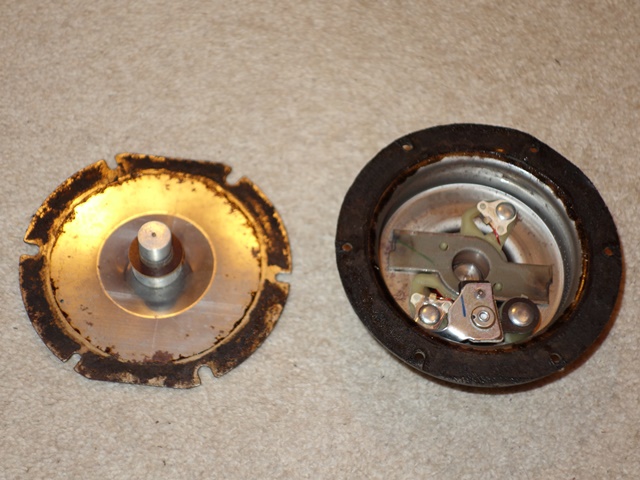
The diaphragm was then removed to reveal the inner workings. Attached to the centre of the diaphragm is a ferrous cylinder so that its movement can be controlled by the rapid switching on and off of an electromagnet.
When current is applied, the ferrous cylinder and therefore the diaphragm is drawn towards the electromagnet. As the diaphragm nears the end of its travel, a disc around the ferrous cylinder hits the base plate of the contact breaker, opening the points. The electromagnetic field then collapses and the diaphragm returns to its natural position and the process is repeated.
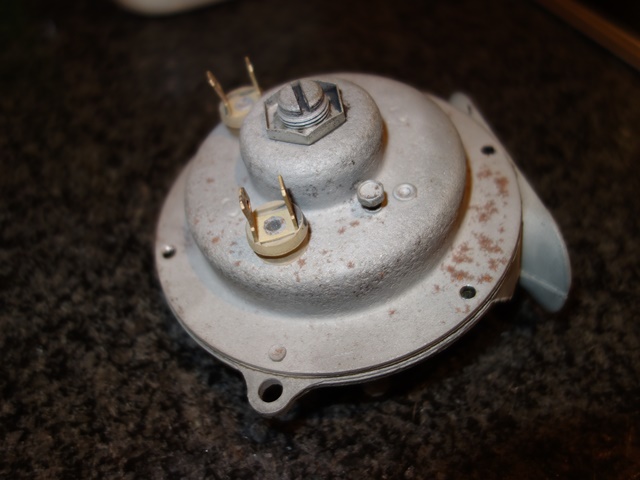
 The resistance of the contact points was around 7 ohms so a light rubbing with 400 grit wet and dry soon got this down to 0.8. Although I wouldn’t have thought this would stop the horn operating. I think the problem is with an external screw fitting which the service manual suggests should not be touched.
I’m fairly sure it has been adjusted at some stage as it’s screwed tight against the ferrous attachment. Therefore stopping any possible movement in the diaphragm.
Of the two external adjustments, the small screw adjusts the contact points gaps. The service manual states that this does not adjust the tone and is only to take up wear in the points. The central screw adjustment, with locking nut, only limits the length of travel permitted by the diaphragm so if it did effect the tone it would only be marginal (ie for fine tuning). I doubt it would give anywhere near the variation to recalibrate it to the low-tone.
Hmmmm …. stumped. Going back to first principles, due to the lack of tone adjustment in the electric components. The tone must be controlled mechanically but the spring rate of the diaphragm is fixed. Therefore the only two things that I can see that would effect the output tone are the mass of the ferrous diaphragm attachment, which would naturally impact the switching frequency, and the shape of the trumpet.
Neither of these two can be changed (easily) with the parts I have in front of me! I’ve found a restorer of old horns, Taff The Horns, who might have a non-working low-tone horn to provide a donor for a transplant. Otherwise plan B is to purchase a repro horn from Holdens for about £40!
A whole post on horns without a reference to a sketch by the late Peter Cook!!
Chris,
i’m a long time reader of your restoration as I am in the throws of restoring a 1967 E Type OTS. With regards to horns you may want to try Lawrie Rhoads of British Car Part Restoration. He only works on Lucas horns and wiper motors, both of which he restored for me. Very helpful and good work at a fair price. He can be reached at 508 359 2077.
Hi Jay,
Thanks for the information regarding the horns and I’m glad you’ve found the posts of interest.
The only person I found in the UK who repairs horns only restores much earlier models. He’s got a healthy backlog of work and so isn’t able to help. I’ll email Lawrie to see if he can help.
It’s odd, almost all the horns appearing on eBay are high-tone. The low-tones only come up as part of a pair. I know the 9H horn was also used on motorcycles of that age so I’m guessing that they may only have been equipped with a single high-tone horn.
Thanks,
Chris
Hi Chris.
I just ran across your posting and may have some info, if it’s something you’re still curious about. I am attempting to restore a horn as well and did, at least, find out what makes the different pitches, at least from one manufacturer. The thickness of the metal of the diaphragm. The info is buried in a 1980’s manufacturer’s Delco-Remy video.
Hi Pat,
Thanks for the information and it solves the mystery of how they obtained different pitches! I couldn’t see how to modify the tone and so gave up trying to modify the high tone horn, purchasing a low tone one that turned up on eBay.
Still, it does confirm that it would be difficult to modify. I had thought it might be the weight of ferrous cylinder attached to the diaphragm that was varied to change the oscillating frequency but I guess changing the diaphragm thickness would achieve the same result.
Regards,
Chris
Hi Chris
I came upon Your site, when looking into my non working horns for my 65 FHC.
I was of the same mind as you to open them up,but how to put them back together.
did you manage to find anyone who can supply the correct rivets?
Regards
Clive
Hi Clive,
Unfortunately not. I contacted a couple of people who restore the horns commercially (one on Wales and the other in the U.S.) and both rebuilt them using small machine screws. I briefly looked into sourcing some suitable rivets but the minimum quantities didn’t make it viable. I also didn’t have much joy finding a local company with suitable rivet presses.
Regards,
Chris
Hi Chris
Thanks for the info,what a great site you have,best of luck with the car.
Kind regards
Clive