
 Unfortunately the heater box was beyond economical repair. The entire bottom section was paper thin and had rusted through in places. The side joints hadn’t fared much better and had rusted from within causing the joints to swell.
Every time the heater housing was rotated to inspect it, showers of rust fell from every opening! The motor and fan cage were also missing.
The heater matrix within is surrounded by a thick felt material and I suspect that this had acted as a sponge. The absorbed water had sat against the base and sides causing them to corrode over a prolonged period of time.
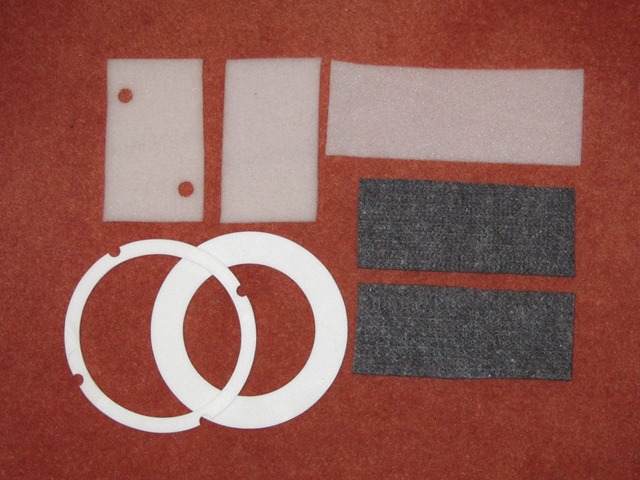 Fortunately new heater units are available (although not that cheaply), so a new one was ordered along with a heater matrix and a kit containing all the various padding materials.
Oddly the padding kit didn’t include the square rubber seal fitted between the heater body and the bulkhead.
If you were going to the effort of replacing all the internal padding, it’s likely you’d be working on the fan housing off the car and so would probably need to replace the bulkhead seal too!
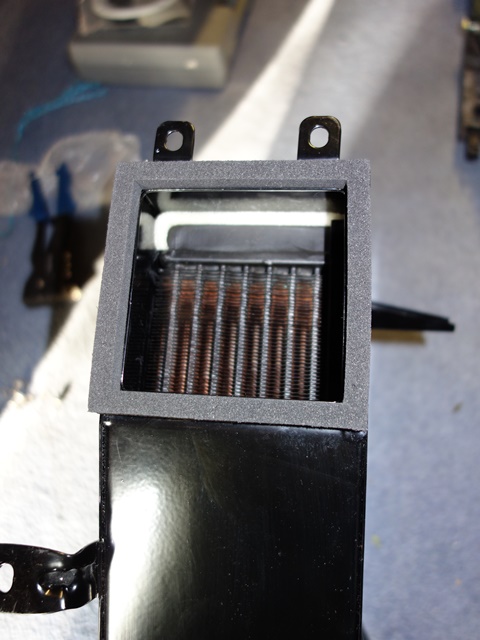
On the positive side, the new heater has an improved design for the fan cage which hopefully might address the reported problems with the original, asthmatic unit. The blades on the original fan cage were flat and aligned radially which isn’t the most efficient in generating a throughput of air. The new cage has curved blades angled towards the direction of rotation.
The heater motor can be switched between two operating speeds and is achieved by introducing a resistor into the circuit to reduce the voltage across the motor. It’s riveted to the motor’s mounting flange and the loom wires soldered in place rather than using spade connectors. I’d stupidly expected a new unit would come with the resistor attached!
The padding around the heater matrix is a thick fibrous material and it was a really tight squeeze to fit it all in. At least the matrix won’t be able to move around!
I found it was necessary to glue the square foam seal to the heater box with contact adhesive, before fitting the heat to the bulkhead. Otherwise, with only one pair of hands, it tends to fall out of place when attempting the fiddly task of fitting the mounting bolts while supporting the heater unit.
| Heater Matrix & padding | Bulkhead seal glued in place | Heater unit installed |
|---|---|---|
 |
 |
 |
 Fortunately the rubber connectors and ducting behind the dash were all present and in good order. So they only needed cleaning in soapy water to remove the grime that have built up over the years.
Hi, have just come across your articles and find it very interesting as after nearly 35 years of ownership I am thinking of doing a similar job to yourself. First question, what is the name of the blue of the paintwork? Thanks Alan
Alan,
I hope you find some of the articles useful. The colour is Opalescent Dark Blue. When I set out on the restoration I had always intended to paint it BRG with a cream interior.
Before I made my final decision, I went to the 50th at Silverstone to confirm BRG was my preferred colour. However instead, it started to cause doubts. I finally chose the Opalescent Dark Blue after seeing one in mid-restoration at Hutsons.
It’s a colour that is worth seeing in the flesh first, in some lights it’s quite blue and in others it takes on a more grey/blue appearance.
Chris
Hi Chris, thanks for that, I wondered if it might be that colour and I really like it. Looks like Hutsons did a good job, just a long way for me as I am in the New Forest Hampshire, but might give them a call Alan
Hi Chris,
I have just stripped the heater box on my 70 series 2 The square rubber seal at the bulkhead was actually stuck to the box with double sided tape. This looked to be as per factory as my car has never been restored. Thanks for the in depth descriptions of your rebuild progress. It’s been both helpful and inspirational. I have just begun my restoration so will be referring to not only the workshop manuals, but to your blog as well. Cheers. Al