The intention was to leave the trimming until after the MOT but this wasn’t possible due to the decision to install inertia seat belts. The next plan was to only trim the rear bulkhead and seat areas – just sufficient for the belts and therefore the MOT. However it’s quite satisfying (when it goes well!), as it’s putting the finishing touches to the car. I’m now going to finish off the trimming before it heads off to the MOT centre.
Until now I hadn’t really considered what I was going to do regarding fitting a stereo. By bringing forward the trimming, this was now more urgent as I didn’t want to have to take out the central and radio consoles once they had been fitted. The options considered were:

Kenwood W707 appears as a
blank panel when switched off
- A modern unit which has a blank panel when switched off
- Converting a period radio, with modern electronic innards
- One of the ‘retro’ looking units made for the classic car market
- Not fitting one at all and just listen to the sounds of a straight 6!
A few years ago Kenwood offered a stereo with a motorised head unit, aimed at deterring thieves. The rear of the head unit was a featureless flat surface. When it was switched off the head unit rotated to display the rear face, mimicking a blank panel. Unfortunately I found out that they had since dropped this range – presumably because the thieves now just take the whole car!
The conversion approach appealed until I saw one in operation. It certainly wasn’t intuitive. It therefore came down to a close call between the last two options. The hope is to take the car on continental trips which tipped the balance in favour of a period looking stereo.
The other problem is the lack of space within the radio console. Modern speakers have a much greater depth so fitting two speakers and a single DIN sized unit becomes very marginal, if not impossible. Others have overcome this by fitting smaller 4″ speakers in the A-post recesses.

Retrosound’s Model 2
Retrosound’s Model 2 seemed to fit the bill on the appearance front. More importantly, due to its very compact size, the two main speakers would easily fit within the radio console. I say ‘main’ as I was soon to be drawn into the scary world of car audiophilia, making the mistake of contacting a car audio centre to purchase some speakers that would ‘just fit’!
Apparently the location of the speakers isn’t ideal as most of the high end frequencies would be lost. The sound quality would be greatly improved by adding some discreet tweeters at the ends of the dash. Again it made sense to add them now rather than regret it and have to pull the dash apart later on. The same advice had been given on the E-Type forum, suggesting a pair of 1″ Boss tweeters would be ideal so I decided to fit these. Although I suspect any sound quality will be long gone at speeds over 50mph with the hood down!
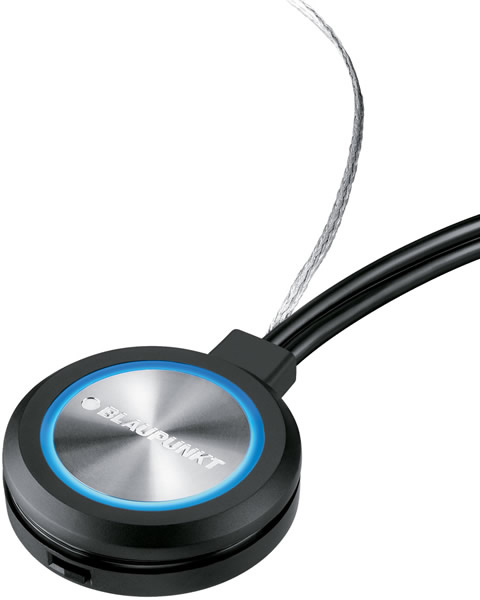
Small 2″ aerial from Blaupunkt
I wanted to avoid drilling holes in the body for aerials/wing mirrors etc which does limit the options for a suitable AM/FM aerial. The feedback on screen mounted aerials isn’t that favourable as they have a tendency to only pick up the strongest stations.
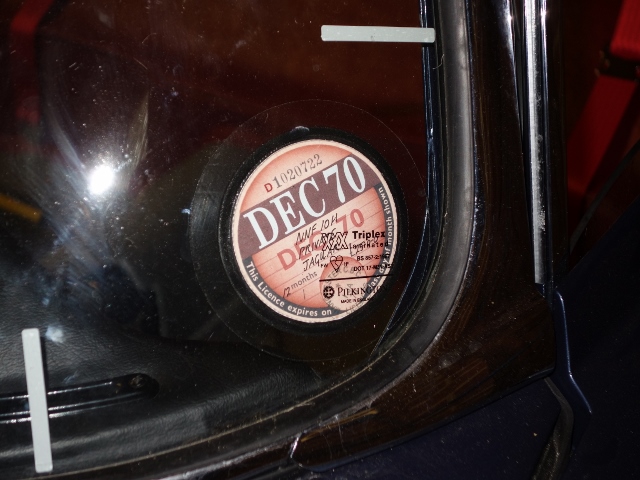
Blaupunkt now make an amplified screen mounted antenna which I’m hoping can be disguised to some degree behind the period tax disc. I hardly listen to the radio anyway so it won’t be a great loss if it doesn’t pick up every station.
The final specifications were:
- Black Retrosound Model 2 Becker pinstripe
- Rockford Fosgate P16 full range speakers
- Boss TW17 tweeters with built in crossovers
- Blaupunkt AM/FM disc aerial
- Good quality 16 swg speaker cables
The spacing of the mounting studs on the speaker grills severely restricted the choice of main speakers to just a handful of 16cm speakers, rather than the more common 16.5cm and 17cm varieties.
The Rockford Fosgate speakers were chosen simply because their mounting slots exactly matched the stud spacing. Although it was only when I tried to fit them did it became apparent that 1) the stud lengths were too short and 2) additional spacers were needed to move the central cone inward away from the mesh grille (making the stud issue worse!).
| Rockford Fosgate speaker size and mounting points were spot on | Apart from the centre section which protruded, hitting the grill | The solution – spacers and the nut/post section of Chicago bolts |
|---|---|---|
 |
 |
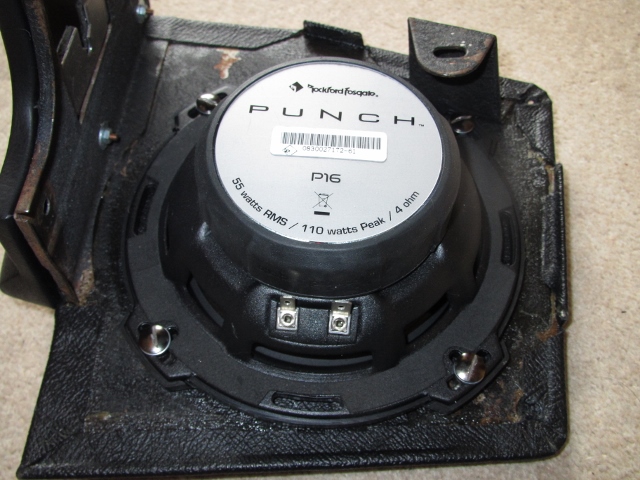 |
I knew I should have gone with the option of not fitting a stereo! As luck would have it the Chicago screws used in leatherwork and I believe menu bindings have the same 8-32 thread. The nut or post pieces were modified by adding a screwdriver slot in the head so they could be screwed down onto the stud ends.
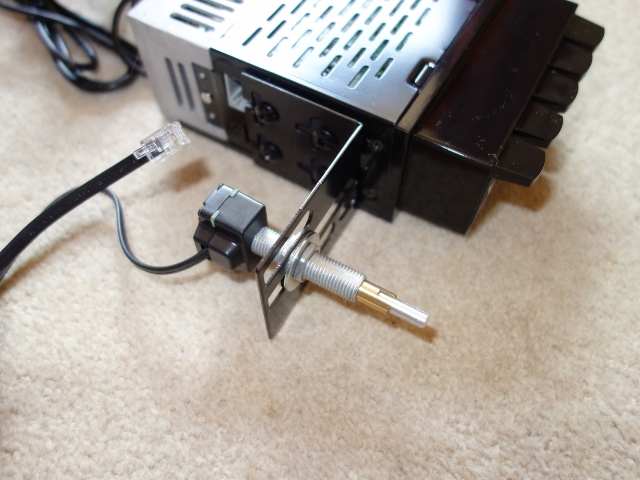
The Retrosound unit has a very flexible mounting system to enable it to fit most classic cars. The blurb suggests the distance between the two knobs is ‘infinitely’ adjustable to suit any application. Although in reality the distance is limited to two distances due to the position of the holes in the final trim pieces.
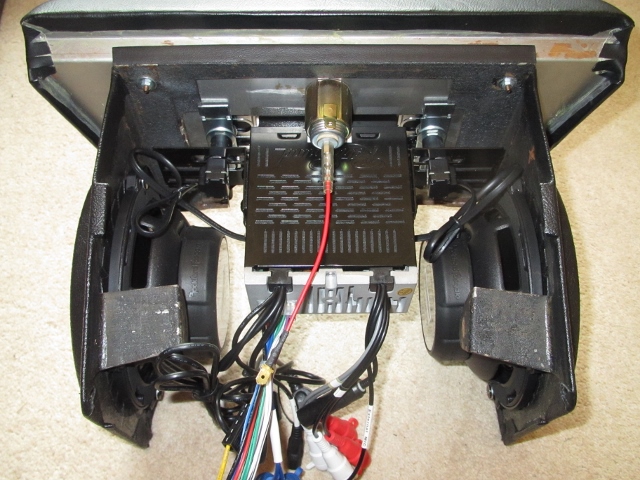
The unit is mounted on the knob spindles and the desired fore and aft position is achieved by adjusting the positions of the various locking nuts. All fairly simple. The difficult part would be the plumbing in of all the various inputs and outputs.
| The mounting spindles slide in slots so width can be set to suit |
Depth of speakers accommodated by narrow width of the radio unit |
|---|---|
 |
 |
The Model 2 has numerous inputs as well as being Bluetooth enabled. So the musical input can be via two USB ports, a standard 3.5mm jack or streamed from a paired device. It also has hands-free functionality and is supplied with a small microphone.
| When off – fake tuning decals are displayed | When on – LEDs display music information |
|---|---|
 |
 |
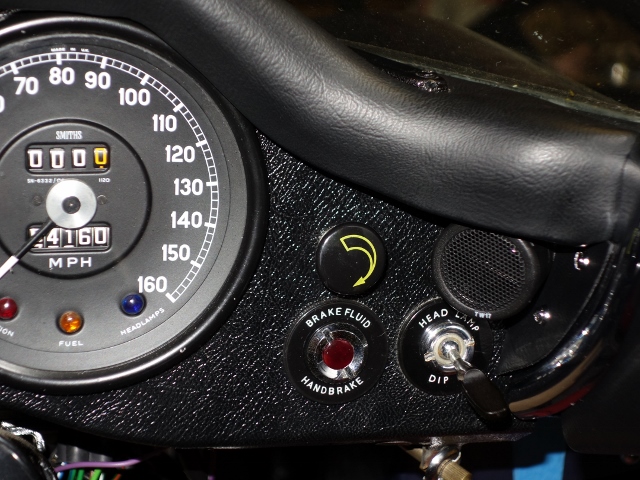
Initially I’ll just be using one of the USB outputs for a permanently wired iPhone lightening connector in the centre console cubby box. This will enable an iPod/iPhone to be charged at the same time, as well as being accessible while driving. The advantage of a hard wired connection, over Bluetooth, is that the display shows the music information, scrolling between artist, album and song title.
The small Boss tweeters were simply stuck to the trim at the ends of the dash with double sided adhesive pads.
| iPod/iPhone connection in central console | Tweeters mounted at the ends of the dash |
|---|---|
 |
 |
In an attempt to hide the Blaupunkt disc aerial as much as possible, a mock-up of the original tax disc has been placed in the lower corner of the windscreen and the aerial stuck to the back of the tax disc holder.
When it was purchased, I thought the whole aerial was contained within the disc. However there are two thin clear adhesive strips which need to be stuck to the windscreen, 6cm away from the metal surround. These strips contain a small metal wire to pick up the radio waves, which are then amplified by the circuitry within the disc. Fortunately the natty blue light feature can be switched off.
| Marking out two thin wires that are stuck to the windscreen to pick up the signal (white is just backing tape!) |
The aerial body was stuck behind a mock-up tax disc to keep it out of sight |
|---|---|
 |
 |
The microphone for hands-free mode will be fitted at a later stage when I can try to work out the best location. Although I’m not convinced it will pick up much above the wind noise!
The stereo was run through its paces off the car and initial results were positive.

Hi Chris, always read your posts with great interest. Just about to start the restore of my radio console too however going for an original radio with modern bits inside.
My old console frame is just bare metal, I see yours is covered in vinyl, is this the correct covering and where did you source your vinyl from?
Thank you in advance.
Hi Jason,
A previous owner had done a bit of a hack saw job on my console. I presume to fit a modern unit so I took it to Suffolk & Turley in Nuneaton (0247 638 1429) to see what was best to do with it. They fixed it for me when I picked up the trim kit I purchased from them. It might be worth contact them to see if they can supply a new vinyl panel. Eric is very helpful and should be able to help you. I seem to remember they weren’t available from SNG Barratt at the time.
I’ve seen several of the companies that put in modern internals at the Stoneleigh spares day and they do look better the the retro ones, which would only fool someone at a glance. The hardest part may be finding suitable speakers to share the console space with whichever head unit you chose.
Good luck,
Chris