Oct 312016
 

Earlier in the year the E-Type Club had announced the inaugural Round Britain Coastal Drive in aid of Prostate Cancer UK. The 3,600 mile event making a clockwise tour around Britain, using the most coastal roads available. The route had been split into 18 daily stages starting from The Goodwood Estate and finishing, two and a half weeks later, back at Goodwood with a lap around the race circuit.

The aim was to get as many E-Types involved to make a visual impact along the route, with the flexibility of entering just single legs to the whole event. I had, rather unfairly, a perception that these types of events might be a little too cliquey and stuffy for my taste and so hadn’t taken much of an interest.

It was only after a chance meeting with a fellow owner, at a remote country pub tucked away on the Surrey/Hampshire boarder, that I was persuaded to reconsider. It was for a good cause after all. So I ended up registering for the first stage down to Lyme Regis, starting the day after the Revival meeting, and re-joining for the last two legs.

The starting leg would be the first prolonged test of my car, with the round trip covering around 450 miles in a day. Despite leaving plenty of time, the drive to Goodwood was fairly stressful due to numerous traffic problems and we only just managed to arrive 15 minutes before the planned start time.

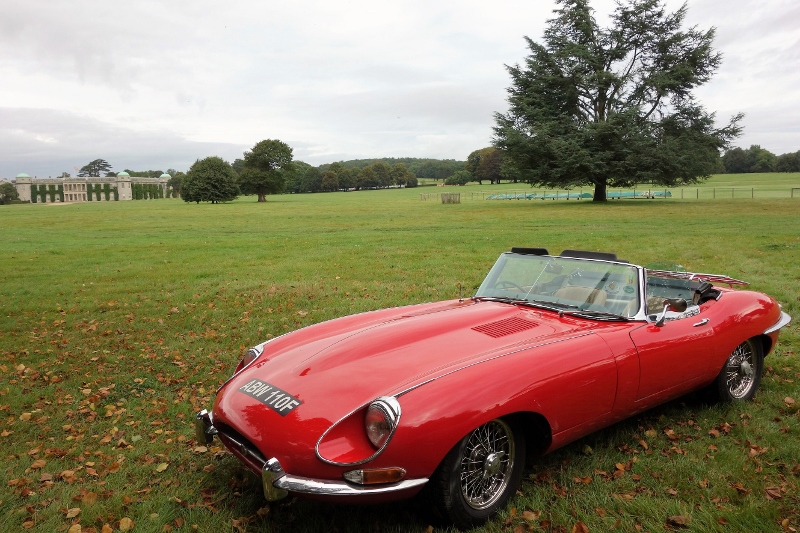
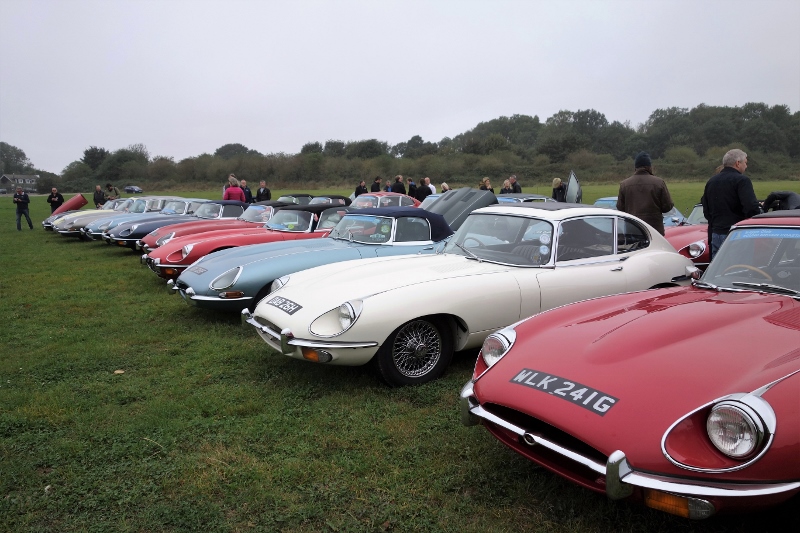
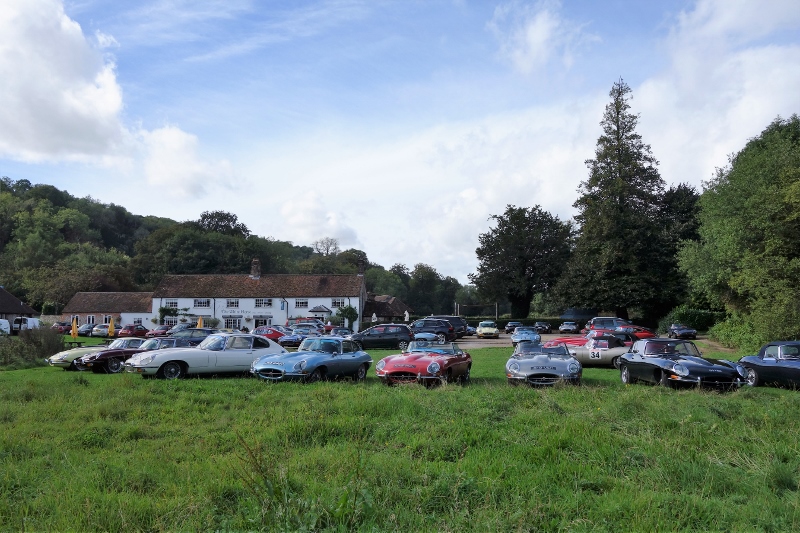
The Goodwood estate provided a perfect location for the start Around 75 E-Types started, including a few Eagle E-Types It was an impressive sight as everyone waited for the start

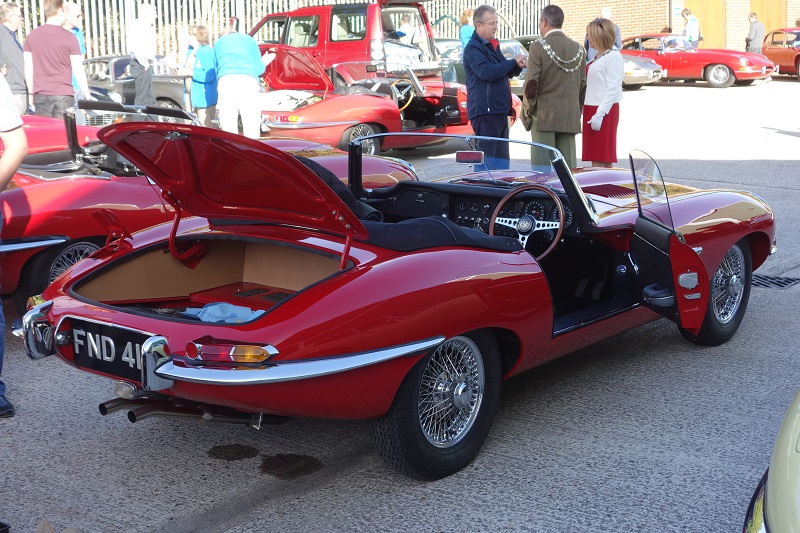
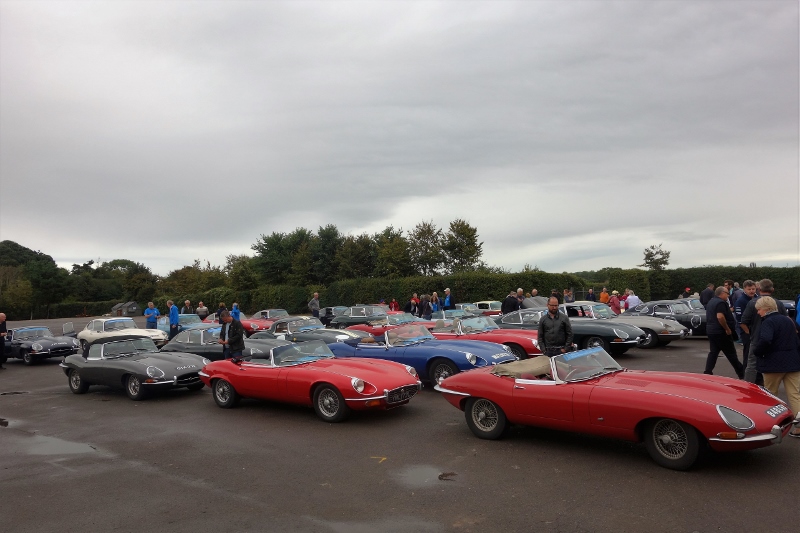
I must admit it was an impressive sight with around 75 E-Type amassed in the grounds of the Goodwood estate, headed by Philip Porter’s 848 CRY (of The Italian Job fame) and including a number of Eagle E-Types. Rather fittingly a Spitfire flew over Goodwood House as we set off up the hill climb.

The aim wasn’t to travel in convoy which was just as well. Within only a couple of miles after leaving Goodwood we were down to a group of about 10 cars and within 15 minutes down to five cars. The organisers had provided an official route to import into GPS devices but this was clearly interpreted differently depending on which make of Sat-Nav each owner used. So there appeared to be a somewhat random nature to the event as cars criss-crossed their way down to the coast.

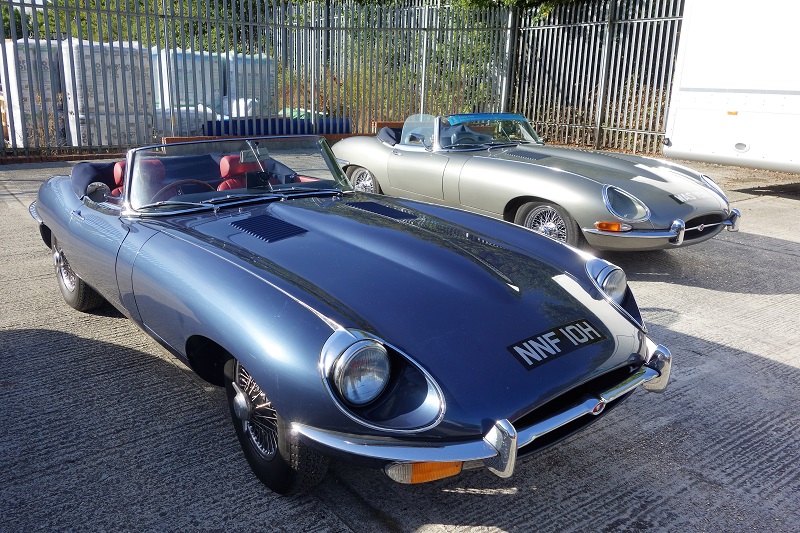
The first stage from Goodwood to Lyme Regis

The tendency was simply to follow the lead car in the group rather than the Sat-Nav which did end up with one amusing detour. The lead car had missed the correct exit at a roundabout. Realising their mistake, they turned into a supermarket to get back on track … only to be followed by all the other E-Types following it.

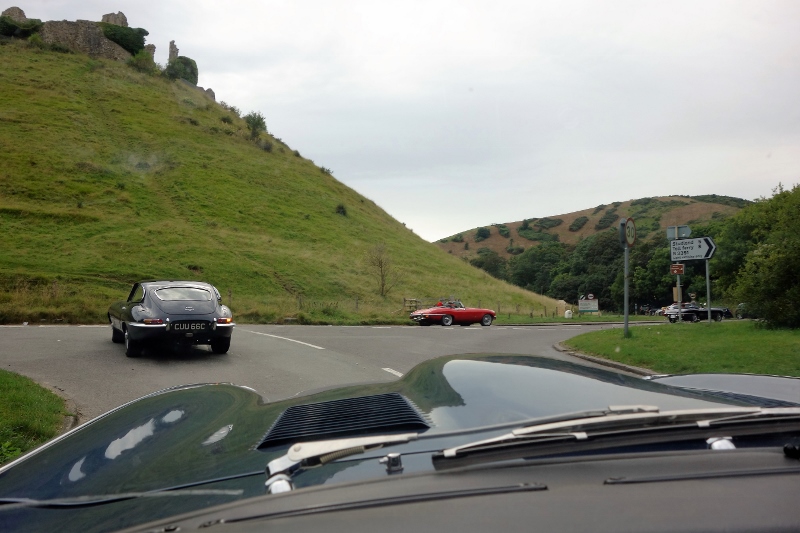
The route only became interesting once we’d cleared the dull suburbs of Portsmouth and Southampton, reaching the New Forest and beyond. The Sandbanks chain ferry to cross Poole harbour provided an ideal opportunity for several cars to re-group and head to the picturesque Pig of the Beach in Studland for lunch. Our getaway was captured by some drone footage kindly taken and shared by Guy Cribb, another participant in the event ….

It was surprising how long the route had taken to the lunch stop. Partly due to the rather lethargic pace of the group of cars I was with and partly due to deviating from the official route on a number of occasions (read getting lost!).


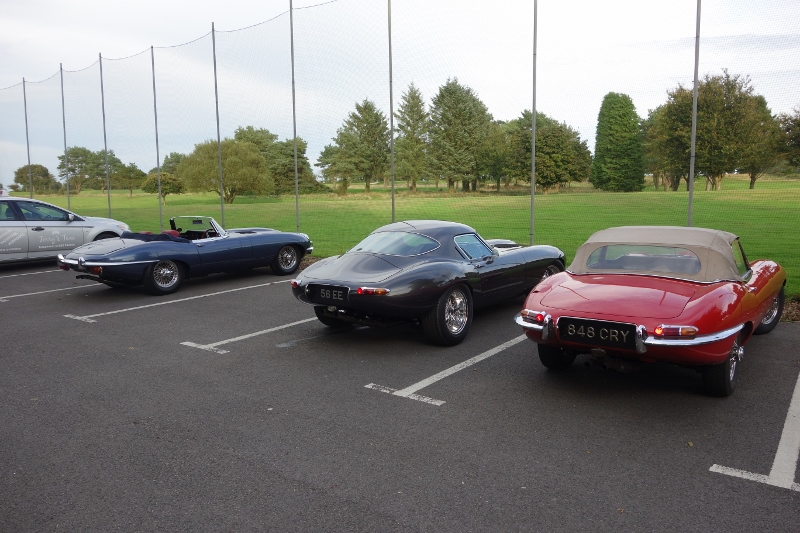
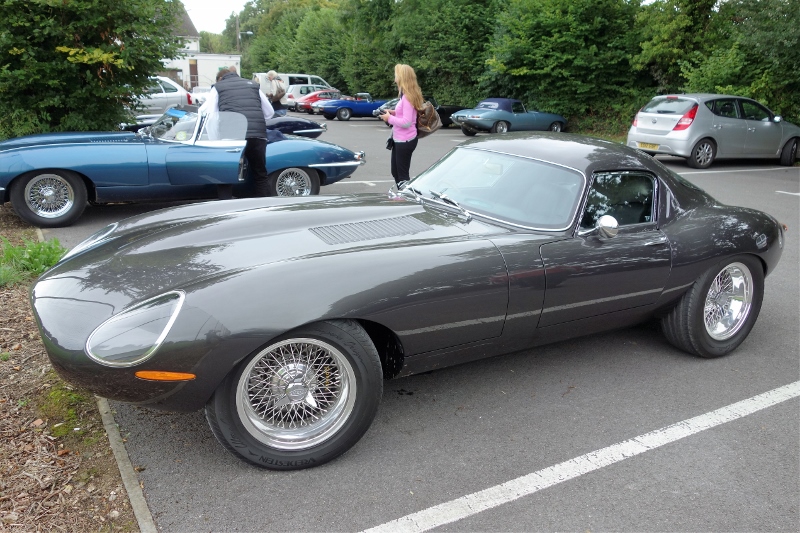
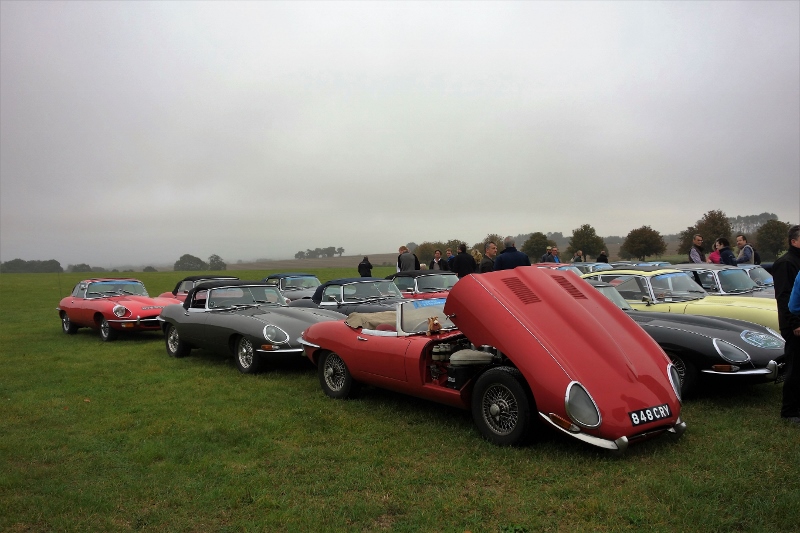
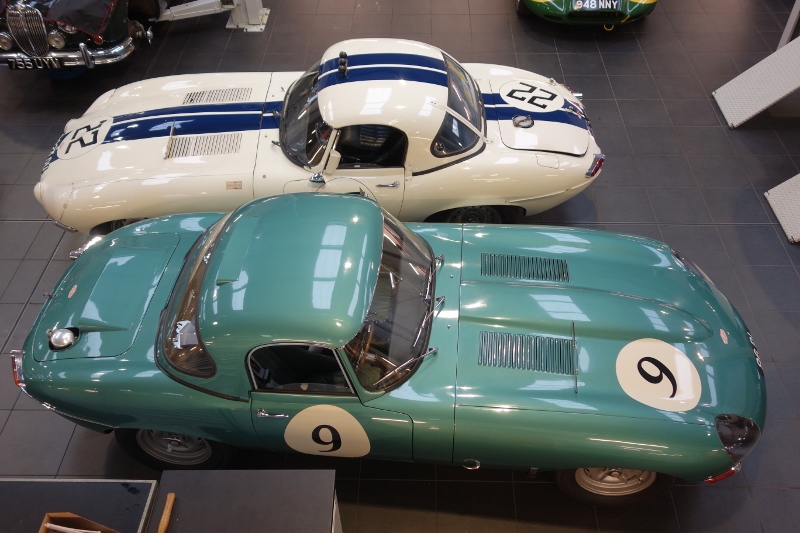
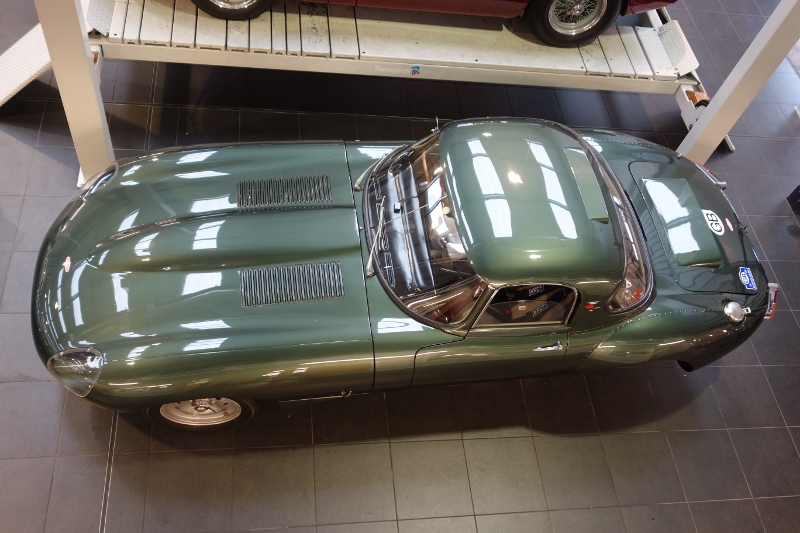
Parked at the finish, next to a
£700k Eagle E-Type and 848 CRY

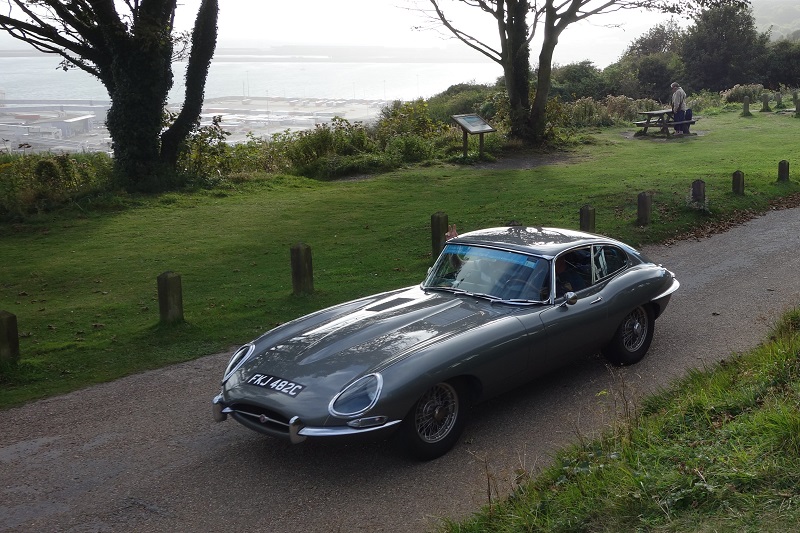
So the latter part of the day became a spirited dash to the finish at Lyme Regis golf club, with superb views along the Jurassic Coast. The car behaved faultlessly apart from a slight hint of a dragging brake towards the end of the day.

The downside of only doing a single leg was that we then had to retrace our steps, turning the 180 mile leg into a 450 mile round trip. It was the first time I’d driven the car at night so I hadn’t got used to fumbling around the dash for the full beam switch.
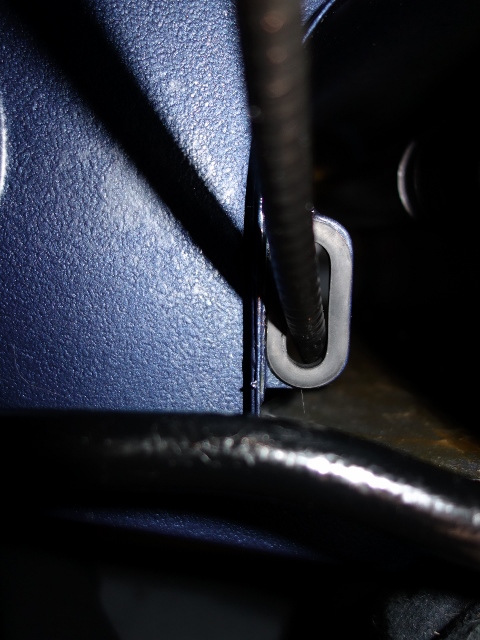

A slight oil leak!

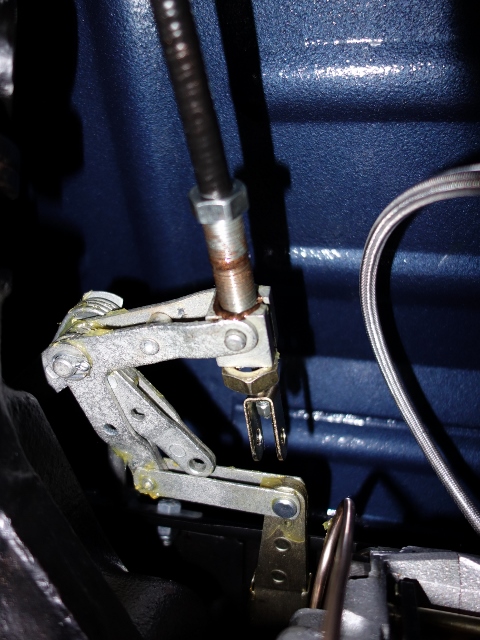
However it was only whilst preparing for the final two stages that I found I had a rather alarming oil leak. Leak? …. it was more of a stream!

I had only just changed the oil before the first stage but the oil level had already fallen to the very tip of the dipstick. It was quite disappointing as it hadn’t been dropping any oil until now but more importantly, if it wasn’t fixed, I wouldn’t be able to take part in the last stages of the event.

The oil was only leaking from the oil filter side but I couldn’t trace the problem. I had assumed it would be very easy to locate where the leak was coming from. All traces of oil were wiped clean and the car taken for a spin before returning to stand over a pit. There was no trace of any oil leak!

Yet when the car was started from cold, a trail of oil was laid on the road. I could even trace my route to the local petrol station several miles away by the oil trail left behind! It appeared that the leak was only occurring when it was cold. The garage’s view was to take part in the final legs but take a 5 litre can of oil, keep an eye on the oil pressure and check the oil level whenever we stopped.

The penultimate stage from Maldon to Folkestone

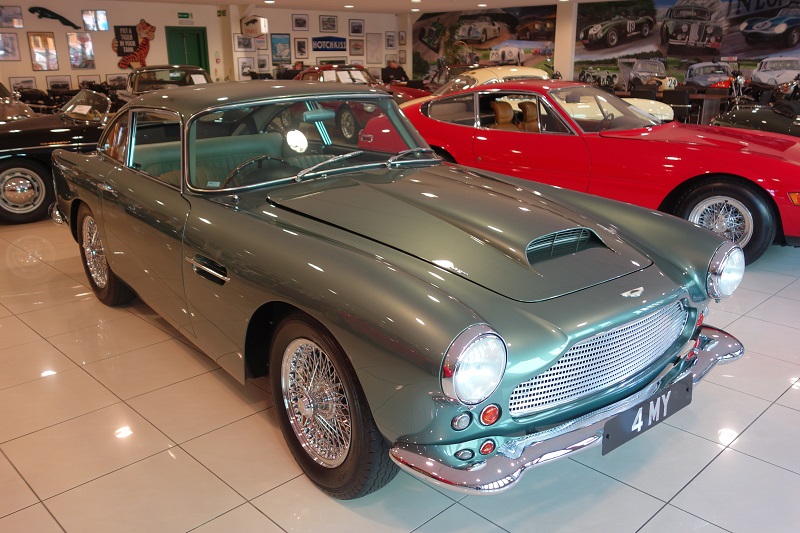
Two weeks later it was an early start to get to JD Classics in Maldon for the start of the penultimate leg down to Folkestone. JD’s showroom had some stunning cars but alas at even more stunning prices! It was however a fitting place to start, with plenty of their mechanics on hand for any final tweaks. Such as one owner had discovered fuel pouring from a leaking cork gasket from the top of the fuel tank.
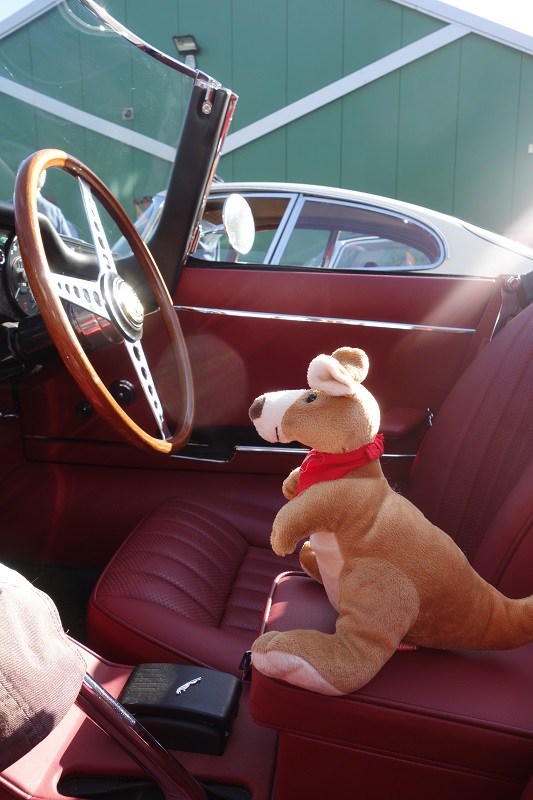
848CRY covered the whole route The RBCD event mascot ….
obviously lost, as we often were!

The drive down to Folkestone was pleasant enough but rather bland and the convoy of cars soon disintegrated into smaller groups. Although it was good to re-group at the white cliffs of Dover and, by chance, another Spitfire provide a fly past. I got the feeling the most picturesque stages were up the west coast of England and Wales and those in the Scottish Highlands.

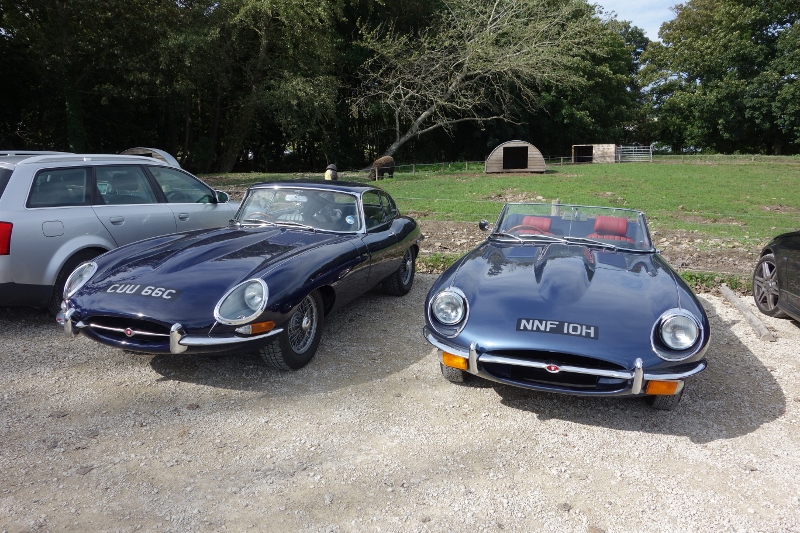
Gathering for an early start on the final leg from Folkestone to Goodwood

The final day was an early start and another spirited drive to allow time to visit to CKL in Battle to look at their historic racing operation and cars in their charge. It made JD Classics showroom look rather ordinary by comparison with 3 of the remaining 11 lightweight E-Types, a couple of D-Types, a Knobbly Lister, a Ford GT40 Mk3 and a few other racing Jaguars in their main workshop.

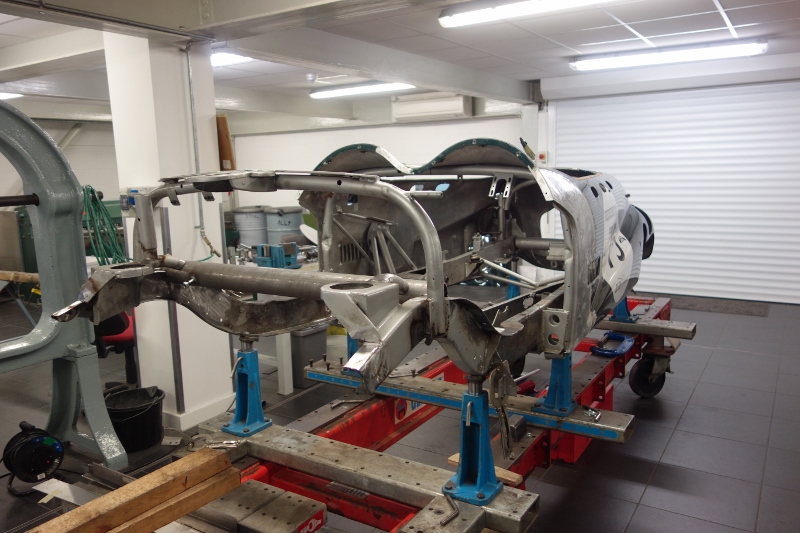
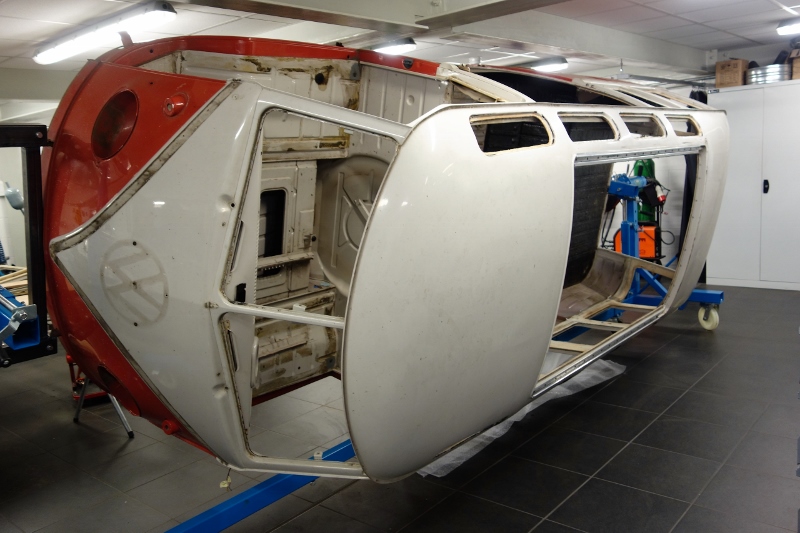
Over in the ‘shed’, as they termed it, were numerous other XK140s, XK150s, E-Types, an XKSS and a few Bentleys for good measure. I need to upgrade my shed! Whilst the space in the bodyshop was being shared between an Allard J2, being repaired after a huge crash at this year’s Le Mans Classic, and a split-screen VW campervan!

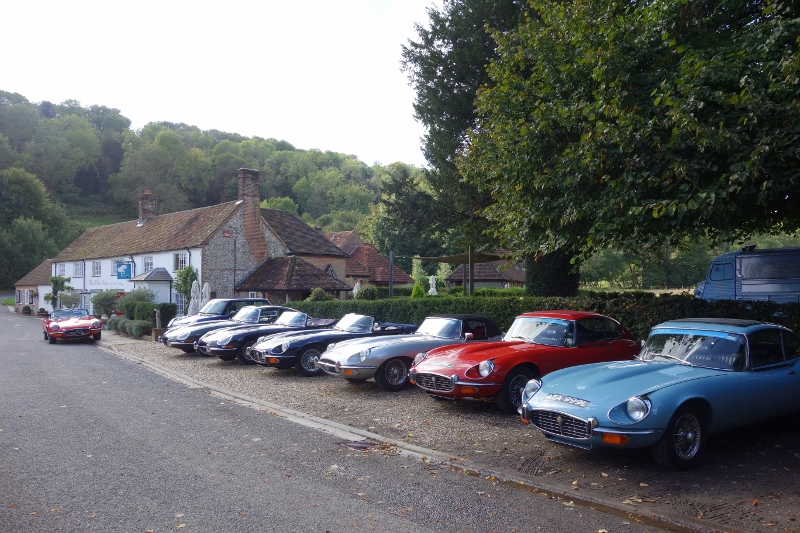
The organiser’s had asked people to arrive at the Goodwood circuit by midday for a planned media opportunity, where all 70-80 cars would make a tour of circuit during their ‘quiet’ hour. The result was the roads started to fill with E-Types as we closed in on the circuit. Fortunately the front bringing heavy rain in the morning had passed and the windscreen wipers were no longer needed. The event was rounded off by a meal at a nearby country pub making for an impressive car park.

It was the second time I’d driven the car in the rain and it’s not a pleasant experience. Terrifying at times! The wipers are worse than useless and visibility was only possible due to the application of copious amounts of Rain-X.

All in all it was a cracking event and the E-Type Club have plans to repeat the event in 2018. Next time I’m planning to do the entire route!

Feb 262015
 

The brakes have been connected and plumbed in for quite a while now. The system only had to be filled with brake fluid and bled, so I had assumed the brakes were essentially complete and wouldn’t be noteworthy. I should have known by now that was almost certainly going to be wildly optimistic …

I had dithered on the type of fluid to use, glycol base or silicone, changing my mind almost on a daily basis before finally making the decision to stick with glycol based DOT4 fluid. The ‘this is absolutely my final decision’ was subsequently reversed to silicone following an interesting article on the subject sent to me by Chris Jackson, whose restoration is being covered in the E-type Magazine.
DOT5 Silicone Brake Fluid

The debate regarding DOT4 (Glycol) verses DOT5 (Silicone) seems to be quite polar in nature. A bit like Marmite – people are either for it or hate it and never the two shall meet! At the time I’d just been working through fixing leaks in the cooling system. Reports of leaks from weeping hoses and splitting repro reservoir bottles are all too common. The thought of brake fluid leaking onto the paint work and remaining undetected paid a significant part in opting for silicone.

However some have raised concerns that silicone fluid might cause rubber seals to swell. Possibly but the composition of the rubber seals has changed over time, with natural rubber no longer used. Modern rubber should now be compatible with all types of fluid.


Automec DOT5 Silicone Fluid

The manufacturer’s blurb suggests silicone fluid is a ‘fill and forget’ solution but I think this is a little wide of the mark as water will find its way into the system. As it doesn’t mix with the brake fluid, it would then pool and cause local corrosion so I’m still planning to replace the silicone fluid periodically, although less frequently than would be the case for DOT fluids.

Apart from the additional expense, the down side of silicone is that, when it is agitated, it has a tendency to absorb tiny air bubbles that are not visible to the eye. This can cause a spongy pedal as the bubbles compress under braking. The simple solution is to leave the fluid to settle overnight before bleeding the system, although that would be more problematic if it ever had to be refilled on a trip.

All the compression joints were checked and tightened. Now the front calipers were bolted to the uprights, sufficient torque could be applied to the bolts clamping the two caliper halves together. Correct torque settings are not published but a brake refurbishing company recommended to torque the 7/16″ diameter bolts to 70 lb-ft and the 3/8″ diameter bolts to 40 lb-ft. I’ll need to keep an eye out for any initial issues.

Remote rear bleed kit


Stevson & Fosseway kits

Another of Chris’ suggestions was to fit one of Fosseway Performance’s remote bleed kits. The standard bleed valves are hard to reach at the best of times, so moving them to a more accessible position on the IRS cage is quite a popular modification. In fact I’d already fitted a similar kit sourced from Stevson Motors prior to installing the IRS unit.

My kit was definitely more agricultural than engineered so I had been a little disappointed when it arrived. The mounting brackets were just pieces of brass sheet that looked as though they had been hand drilled and then bent in a vice.

Still their function is fairly basic and the aesthetics is not a great issue, being tucked up underneath the car, so I had fitted the Stevson kit. It was only later, when I was working underneath the car to re-fit the handbrake cable, did its design start to irk me. My patience was wearing thin after catching the sharp corner of the brass bracket for the umpteenth time.

The revisiting of the handbrake was because I’d routed the cable incorrectly. It should pass through an eyelet on the inside of the transmission tunnel, with a rubber grommet protecting the cable. The cable was too stiff to re-route in situ by disconnecting the cable from the handbrake mechanism. So the entire cable had to be removed.

Re-routing couldn’t be achieved by just disconnecting at compensator linkage Correct routing of cable through grommet in transmission tunnel eyelet

The final straw came when I found that the seat for one of the bleed valves had been machined too far. So the coned face at the end of the valve could never make contact with the seat, let alone form a seal. Longer valves are available … but not in the course thread used in the kit. There was no alternative – it had to be replaced.

I’m sure Stevsons would have rectified the problem but I now had the opportunity of fitting a better quality of kit. An order was placed and the Fosseway kit arrived the next day! The main difficulty was, with the IRS now in place, access was severely limited. The front pair of springs and dampers had to be removed to access the calipers.

Forward rear springs removed for access The Fosseway kit has better banjo attachments Fosseway kit uses sprung bleed valves

The Fosseway kit uses a banjo attachment at the calpiers which is a neater solution and much easier to fit, as it doesn’t require the flexible pipe to rotate when tightening it into the caliper. The other difference is the style of bleed valve used, sprung valves rather than standard solid valves. The sprung valves help with bleeding as the spring stops air entering the system between pumps of the brake pedal. In the end, replacing the remote bleed kit was easier than I had thought and only took an hour and a half.

Brake Bleeding Woes!
This was another task that proved far more troublesome than I had expected. Most methods of bleeding require the help of an assistant. The exception to this is vacuum pumps, such as the Mityvac, which can be operated single-handed. The vacuum is applied to the bleed valve to draw the fluid through the system so both the vacuum and bleed valve can be controlled from one location.


Mityvac vacuum bleeding tool

It was for this reason I purchased a Mityvac pump to replace my old Eezibleed tool. The Eezibleed pressurises the reservoir to push fluid through the system but still requires two people to operate. So doesn’t really offer anything over the traditional method of pumping the brake pedal.

The correct bleeding sequence according to the service manual is the near-side followed by the off-side, starting with the rears and finally moving to the front brakes. The reservoir bottles were filled, the RH reservoir feeding the front brakes and the LH reservoir the rears … let the bleeding begin!

After about 1/2 hour of trying with the Mityvac, absolutely nothing had come out of either of the rear valves. Time for plan B – the Eezibleed was rigged up to the reservoir. All this achieved was pressurising the bottle to what looked like bursting point and spraying fluid everywhere from around the cap. Thank goodness I’d gone for silicone fluid! Still nothing was coming out at the rear calipers.

Plan C! The traditional approach – the good old brake pedal and a patient helper! The resistance started to build after 20-30 pumps of the brake pedal. However this would dissipate after about 30 seconds. Frustratingly there was still no fluid coming from the rears. I suspect pumping the pedal was only pushing fluid into the front circuit and the resistance felt at the pedal was due to the air in the pipe being compressed. Once the pumping stopped the air pressure would force the fluid back into the reservoir.

Stumped, I decided to search the web to find out if there was a specific technique or trick that might help. At least I found out that I certainly wasn’t alone in having trouble bleeding the rear brakes, especially filling a dry system. One tip was to try bleeding the brakes with the engine running as the servo would be boosted by the vacuum. Still no joy!

Another suggestion was to first check the operation of the valve located in the output port of the servo cylinder. Once it had been confirmed fluid was coming out of the servo cylinder, simply loosen the rear bleed valves in turn, allowing the system to bleed naturally, under gravity. Note: the sprung valves need pressure to compress the spring to allow fluid out and so had to be removed for this method

The height of the reservoir above the remainder of the system provides a sufficient head of fluid to allow gravity to do the work for you. Whether the removal and inspection of the cylinder valve had fixed the restriction I’m not sure, but fluid was now coming out of both rear bleed valves.

Success was short lived …. when the brake pedal was depressed, fluid leaked out of the three way union mounted on the IRS cage. The problem was found to be the new flexible Goodridge brake pipe. Although sold as a direct replacement for the E-Type, the rear attachment was too short. It was a similar problem to the remote bleed kit – the attachment could never make contact with the seat and therefore create a seal.

Short end of Goodridge brake hose was too short! The additional mechanical brake light switch

Several days and a new hose later, the system was finally bled. At the same time the last few braking tasks were completed: the brake pedal was much higher than the accelerator pedal and the mechanical brake light switch was fitted.

The height of the pedal is set by adjusting a ‘stop’ screw in the pedal housing, which was set to remove any free travel in the brake pedal. Unfortunately the clutch pedal is too high as well but this doesn’t have any adjustability. Other owners have had the same problem, caused by the push rod being 1/2″ too long on the replacement master cylinders. Another job to the list!